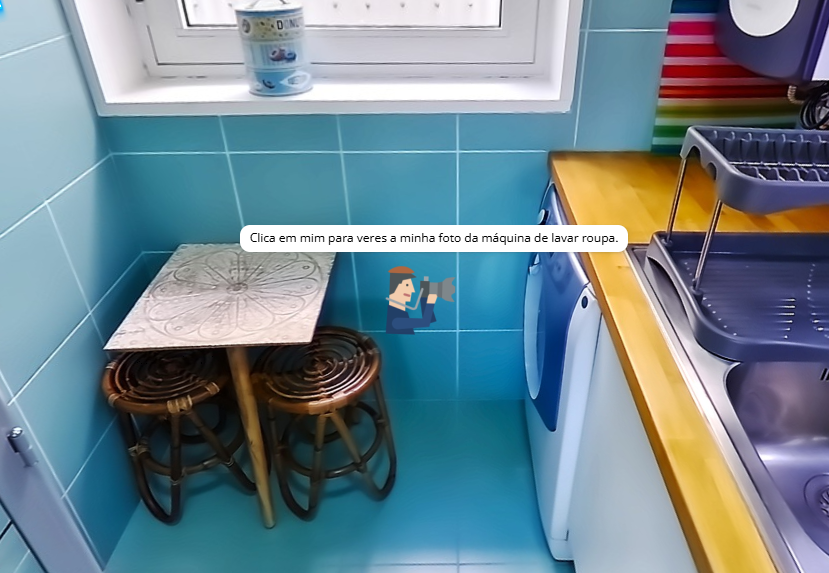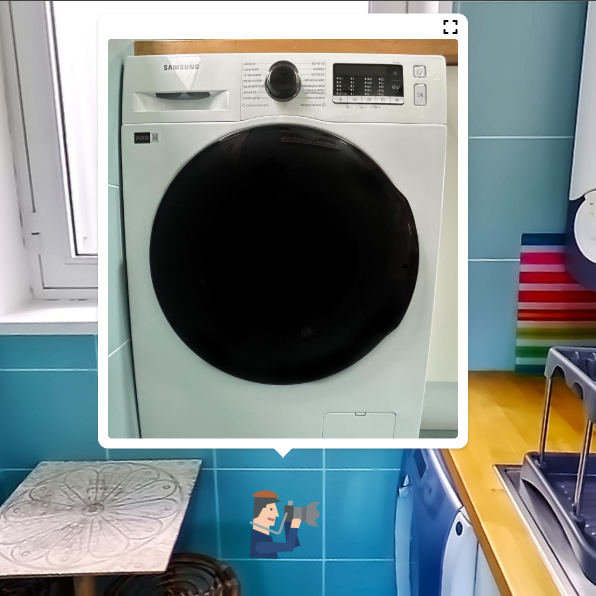
The Points of Interest/Points of Interest/POIs are icons that can be placed on the Tour, in the same way as bookmarks, but which have the function of showing various types of information to the user.
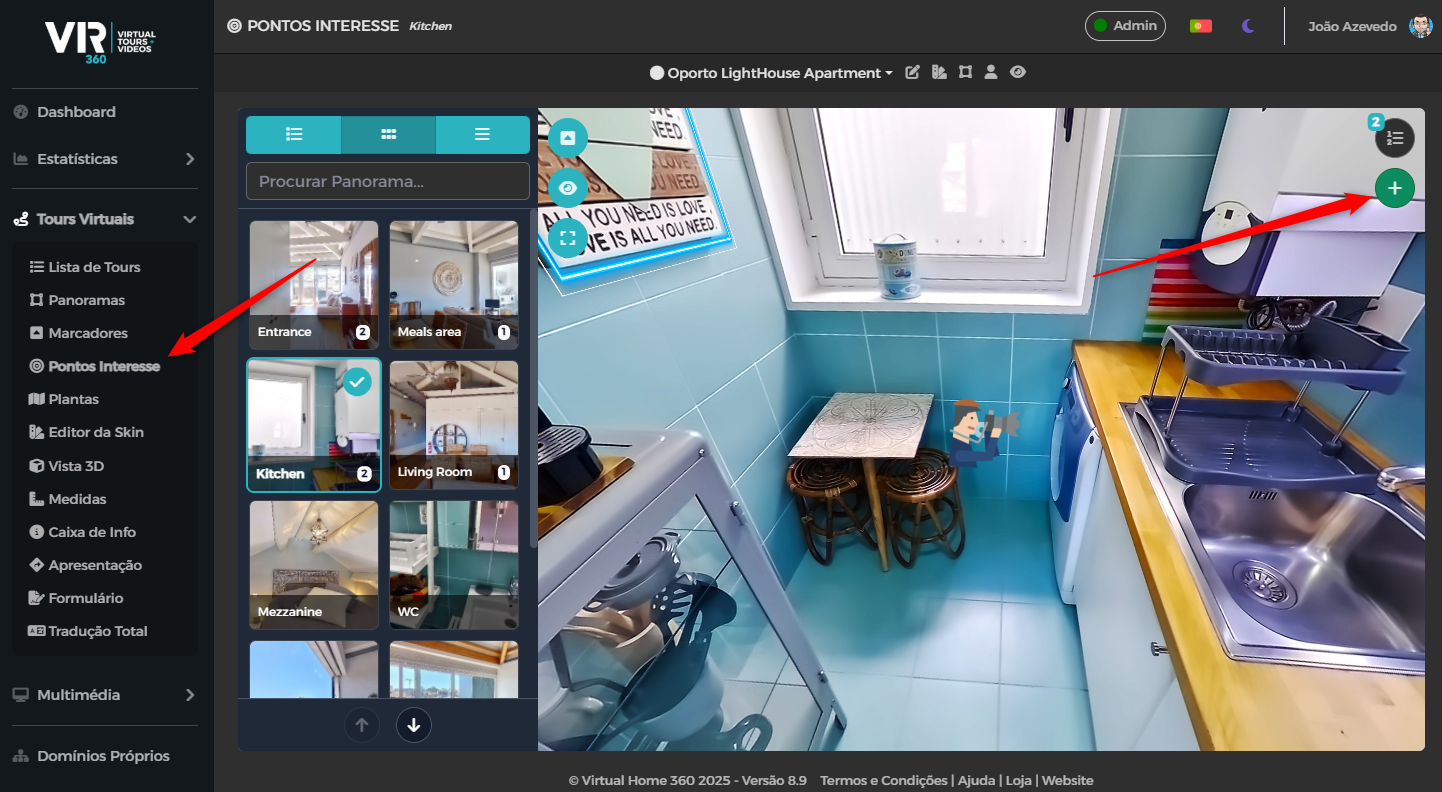
The POIs menu is on the side panel.
After choosing the panorama, you should point the 360° image to the desired position and press the “+” button in the top right corner.
As with bookmarks, it is possible to change the position later.
POI options
POI style
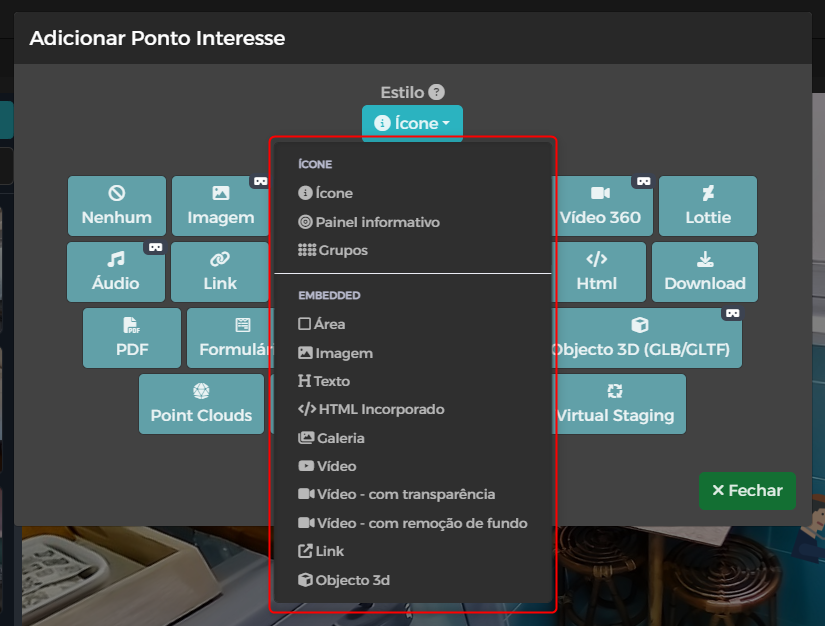
All POIs are pre-selected as icons, but you can choose other styles:
- Icon – It is an icon that can release all types of content listed below in the article.
- Information panel – It is an icon that launches text information with title and body with a simple and appealing graphic.
- Groups – This is an option that allows multiple POIs to be grouped into one icon, and when you click on that icon, the rest of the POIs appear.
- Area – It works as a content icon, but now an area in the panorama is selected to launch the chosen content when clicked.
- Image – It works like the area, but in this mode we use an image in which we can adapt it to an area of the panorama and we can launch the chosen content when clicked.
- Text – It works like the area, but in this mode we select an area of the panorama and in addition to being able to insert text into the panorama, it is also possible to launch the chosen content by clicking on that area.
- HTML Incorporated – Allows us to enter HTML code to build the most personalised content
- Gallery – It works like the image, where we select an area in the panorama, but this time it only serves as an image gallery.
- Video – It works like the image, but in this mode we select an area in the panorama to incorporate a video.
- Video (with transparency) – It works like video, but in this mode we can use a MOV or WEBM file with alpha transparency/channel
- Video (with background removal) – It works like video, but in this mode we have the ability to adjust a chroma key to remove the solid color from a background in a video.
- Link – It works like the image, but in this mode we can incorporate a functional website within the tour itself.
- 3D object – It makes it possible to place a 3d object which, in addition to launching the content chosen, can also interact with that object in a simple way.
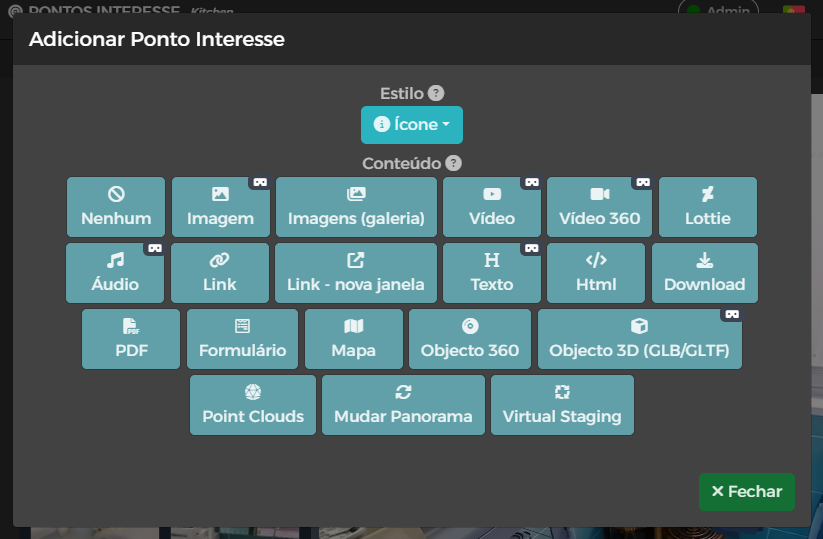
Each POI you enter can display the following content when clicked:
- None – It serves only as a visual note.
- Image – Displays an image.
- Gallery – Displays a gallery of images
- Video – Displays a video
- Video 360 – Displays a 360 video
- Lottie – Presents animations Lottie (are more fluid and lighter animations than gifs)
- Audio – Displays an audio clip that overlays the Tour Audio
- Link – Displays a web page Inside the Tour Window
- Link (new window) – Displays a webpage but has the option to open it in a new tab/window or in the window itself.
- Text – Displays a plain text box
- HTML – Displays a box with HTML content
- Download – Starts the process of downloading a local file, or from an external URL
- PDF – Submit a PDF
- Form – Submits a form for the visitor to fill in
- Map – Displays Google maps and Google street View maps
- Subject 360 – Displays a photo gallery, where the goal is to show a rotating object
- 3D object (GLB/GLTF) – displays an image of a 3D object such as a “dollhouse” (the file to be uploaded needs to be GLB or GLTF) Even if some styles (Gallery, Video and Link) show blocked content, it is necessary to upload none to be able to put it in the panorama.
- Points Clouds – displays a json file with the Point Cloud data uploaded, allowing viewing the 3D space captured in the viewer.
- Change Panorama – It presents a different picture from the main one.
- Virtual Staging – Presents different elements in the picture we are viewing
Simple example of how to use the image POI
Image POIs are great for showing specific details of a panorama, as can be seen in the following example.