The Markers they serve to connect panoramas, allowing the user to “walk” from one room to another. After uploading the Panoramas, we put the Markers to facilitate navigation.
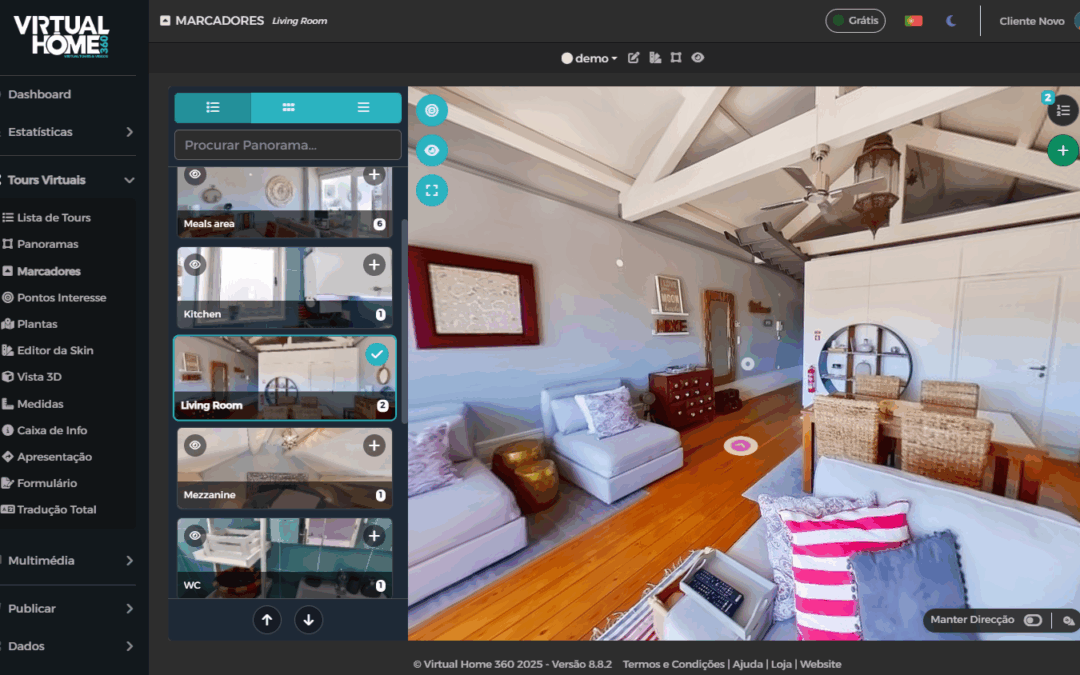
Within Virtual Tours, you can select the Menu Markers. Here is the list of panoramas created.
By selecting the bookmarks menu, by default you open the first panorama of the list, but you can always choose the panorama you want to work on so that it appears in the viewer.
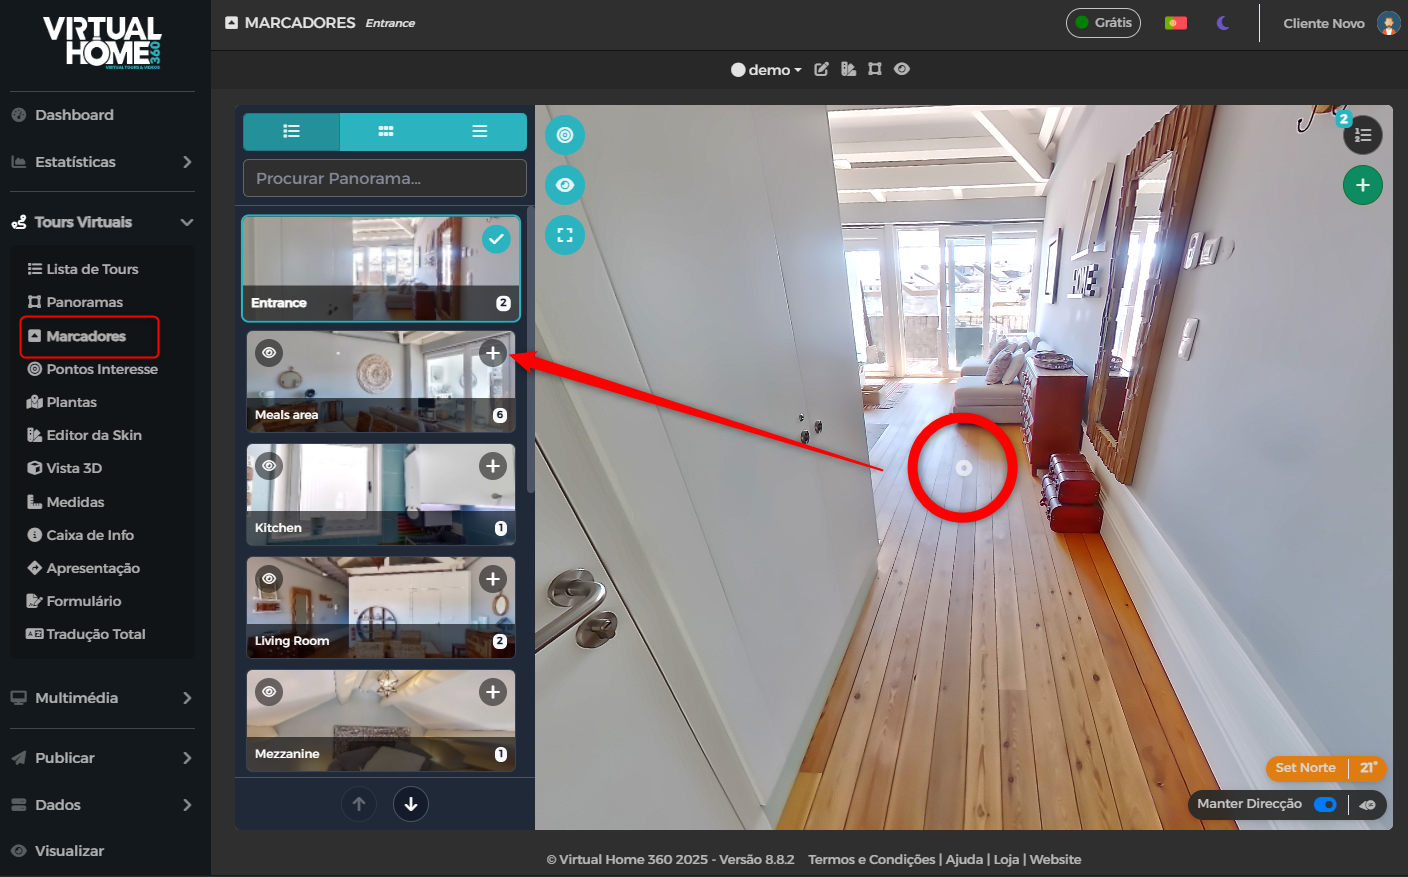
Point the panorama to the place where you want to place the marker and press the "+" sign of the panorama of that space to proceed with the process.
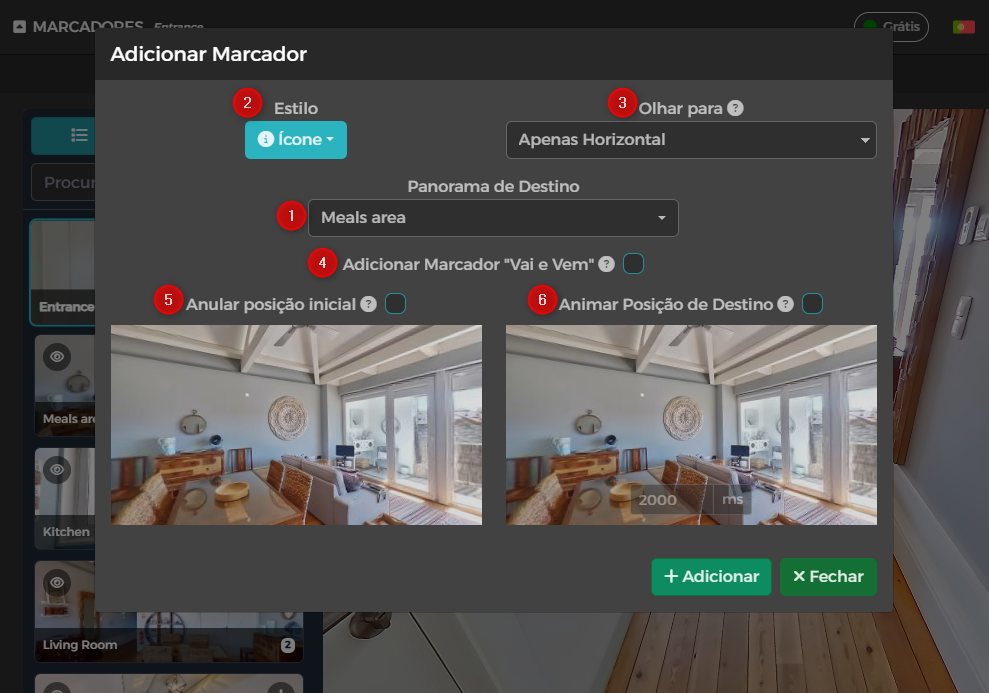
The menu that appears at this time gives us the following options.
1 – O Panorama of Destiny, that is, the panorama we want to go to when loading on that marker.
when you have clicked on the + sign of the panorama in question, it is already selected;
2 – if we want to use an icon or selection area;
3 – how we want Look for the marker that is clicked;
4 – if we want to add a return marker to the destination panorama;
5 – We can establish the initial viewing position when navigating to that panorama.
6 – and whether we want to animate the destination position.
That is, when entering this panorama, it will automatically move from the initial position to the destination position.
It is now possible for the visitor to navigate from point A to point B on the Tour.
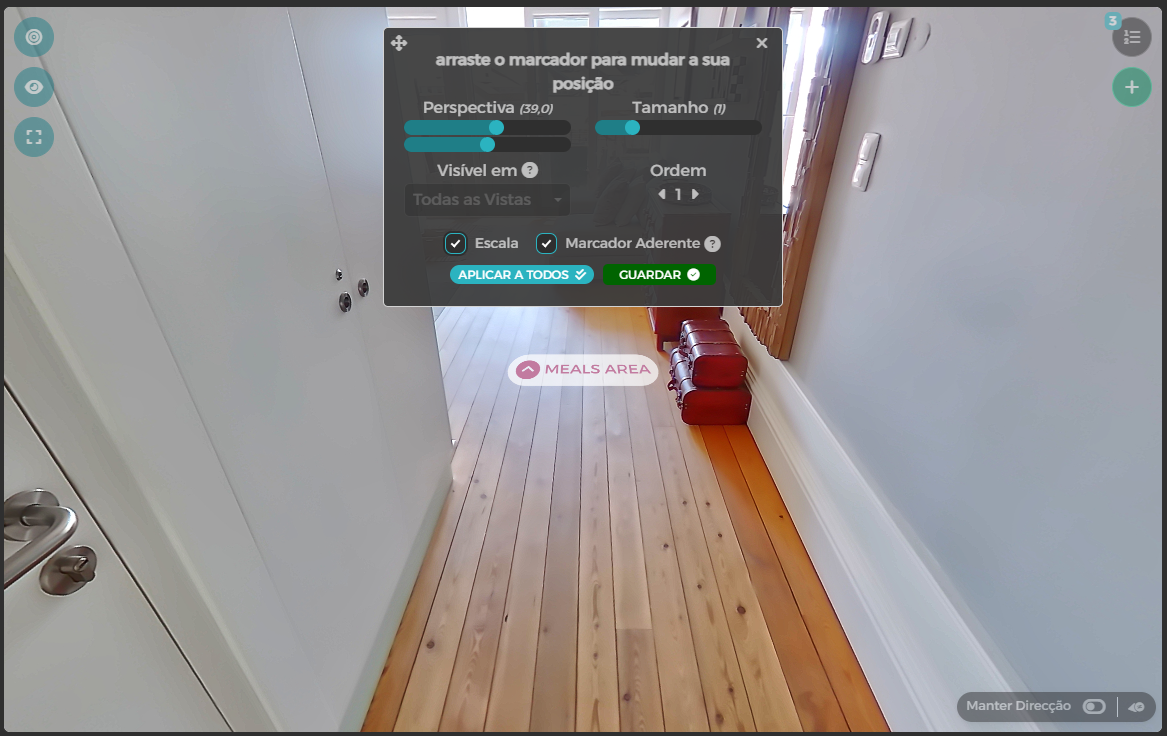
After clicking on add, the edit window appears and you can change the view and size of the marker. With the left mouse button pressed in the panorama you can modify the positioning of the marker.
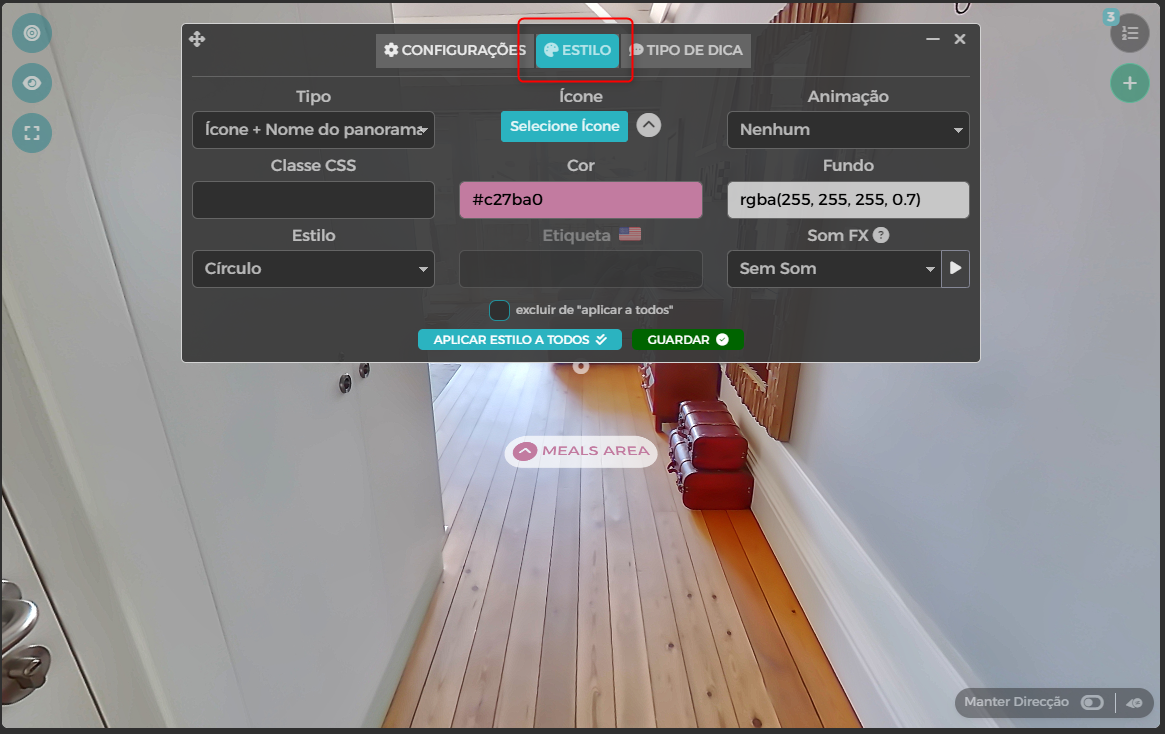
After clicking save, a final menu will appear where you can change the style of the bookmark and even apply these style changes as default to the rest of the bookmarks
After saving the changes, repeat the process with other markers to create a simple and logical navigation.